- Another Night Photo Trip
- Human Portrait Under the Milky Way
- Windy Situation
- Just Keep Shooting
- Drone Light Painting
- Final Photos of the Night
- Summary
Another Night Photo Trip
Well, I made another trip to shoot the Milky Way and attempt drone light painting. I took a coworker out with me this time to see the Milky Way in our desert skies. He was quite amazed and we both had a great time under the stars.
When we arrived there was still some light from the sun which is always good for setting up. I setup the camera and tripod and we watched as the Milky Way came to life. My coworker took some great photos with his iPhone as well.
Equipment used for this photo shoot:
- Canon EOS R
- Canon RF 15-35mm lens
- Vanguard VEO265AB Aluminum Travel Tripod
- uvBeast V3 365nm Black Light UV Flashlight
Once the sky darkened I started taking photos of the Milky Way over the Joshua Trees. After a cloudy day the evening gave way to clear skies. The photo below was the first of the evening shot.

Focal Length = 15mm
Shutter Speed = 20 seconds
ISO = 3200
For any of you that have been following me this year you know I can’t do a night photo shoot without UV light photo. I used my UV light to light up the foreground in the photo below.

Focal Length = 15mm
Shutter Speed = 15 seconds
ISO = 3200
Photography is all about composition and finding different angles. I just angled the camera a little differently in the photo below to offer a different perspective.

Focal Length = 15mm
Shutter Speed = 18 seconds
ISO = 3200
Straight on with the Milky Way over the Joshua Trees.

Focal Length = 35mm
Shutter Speed = 18 seconds
ISO = 6400
Human Portrait Under the Milky Way
As I mentioned, a coworker joined me on this trip and I snapped some photos of him under the Milky Way. The photo below is him standing in front of the Joshua Trees under the Milky Way.

Focal Length = 15mm
Shutter Speed = 13 seconds
ISO = 3200
Windy Situation
I mentioned earlier we had clouds in the skies during the day and clear skies in the evening. This made for great viewing of the night sky. I have been out shooting night photos throughout much of this summer and have not had an incident. Unfortunately, this was not an incident free evening.
I was warned earlier this year from another photographer friend of mine that I needed a weight bag. What is a weight bag? A weight bag can be strapped over your tripod so you can drop rocks or anything else adding weight for stability. As of last night, I can now confirm this is a much needed item in my inventory. The Leofoto RB Tripod Rock Weight Anchor Bag is beneficial and can save your equipment.
I wish I had listened to my friend earlier and purchased the weight bag then. I turned away from my tripod for a couple seconds and the wind blew my tripod over causing my camera to fall to the ground. By the time I noticed it was falling it was too late.
When we picked up the camera off the ground, I immediately did a visual inspection on the lens. The glass didn’t show any signs of damage. There were some scratches on the edge of the lens. The worst damage is the zoom. Unfortunately, the camera can only shoot 35mm now as it won’t zoom out to any other focal lengths. Fortunately, I do have accidental coverage so a claim has been filed.


Just Keep Shooting
Damage of the lens was assessed and determined the camera was alright and I could still shoot 35mm with the lens. At least I could still shoot so we didn’t have to call the night early. We took a break from photos and turned everything off to view the night sky with our eyes. Later, we walked around looking for scorpions using my uvBeast V3 365nm Black Light UV flashlight.
Even though the winds were blowing I finally decided to pull out my drone. This was the 2nd time I’ve attempted light painting with my DJI Mavic Air 2. In the photo below I was able to illuminate the Joshua Trees from 50ft above using the landing light on my drone.

Focal Length = 35mm
Shutter Speed = 15 seconds
ISO = 1600
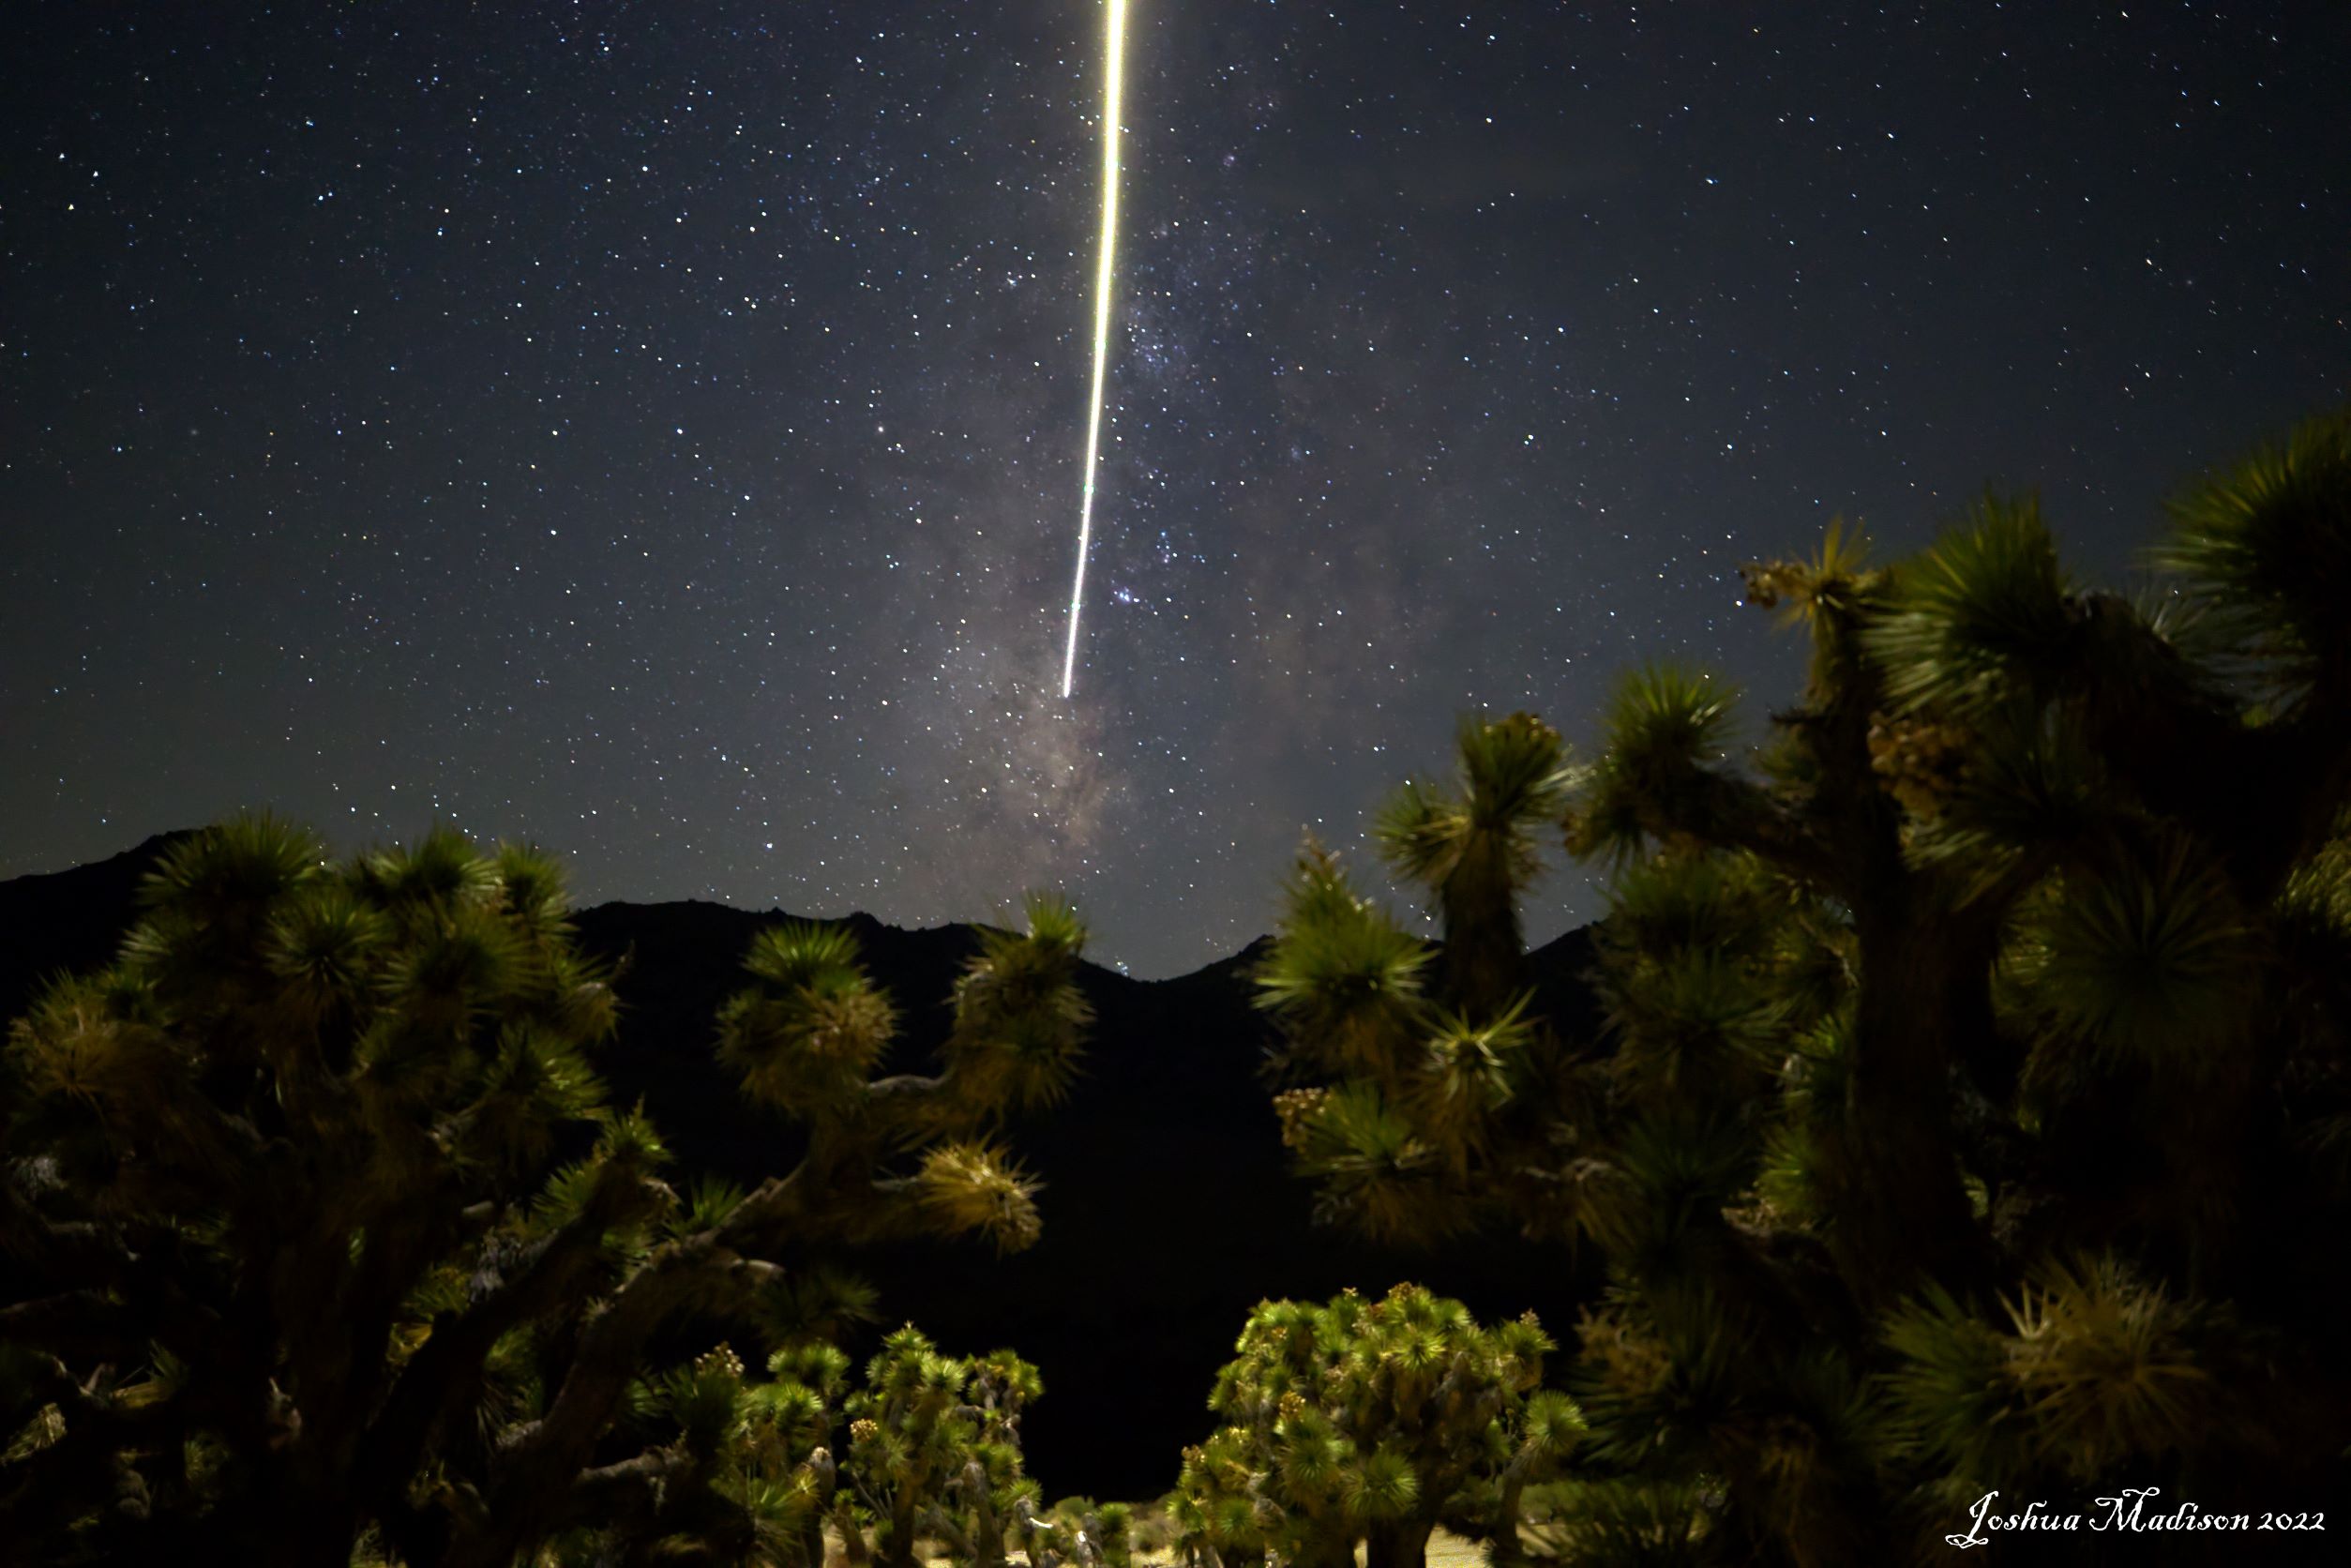
Drone Light Painting
First off, what is drone light painting? Drone light painting is the art of flying a drone over a subject and lighting it up. I use the drone light to light up a large area by flying high overhead or a small area flying low.
The drone landing light creates a unique light ray in the sky while illuminating the ground. This offers some interesting perspectives in photography. I flew the drone manually for the photos below for some creative light art in the sky. All the photos below were shot with 35mm, 15 seconds exposure and ISO 6400.


Final Photos of the Night
Our mission of the night was to shoot the Milky Way before moonrise. Mission was accomplished and we were still in the field when the moon started glowing over the mountain around midnight. We saw several flashes over the mountain from what appeared to be lightning. We didn’t see the lightning, so we enjoyed the light show and moon glow in the sky.
The photo below was taken a little after midnight just before the moon showed over the mountains. This photo allowed me to capture the mountain silhouette, clouds, stars and the moon glow. This made for the perfect photo to close out an eventful evening.

Focal Length = 35mm
Shutter Speed = 15 seconds
ISO = 3200
Summary
The Milky Way was beautiful as always and we had amazing clear skies. The only spoiler of the evening was the wind knocking over my tripod damaging my lens. Overall, it was great to get out and spend time and share our desert skies with someone.
Please be sure to rate this article and let me know if you have any questions or comments in the comments section below. Thank you, Josh!